

A few years back, Microsoft decided to force everyone to use its cloud service whether they wanted to or not.
Already feeling disappointed with what’s-his-name, a guy who poses as a disease prevention authority despite no medical education, I began hoping to exit Windows forever.
The privacy expert in the video below, Rob Braxman, describes the predatory behavior or Microsoft in perfect detail, but he’s is so smart and immersed in PC tech that he has no clue whatsoever about how far beneath his knowledge the average (or in my case, the below average) PC user sits. It would be like me trying to intelligently discuss basketball with an NBA star.
So I fed Rob’s video transcript into Claude and asked it to make a simple list of things a person with radical intolerance for abbreviations could follow to save his stuff, send Windows 11 into a blissful afterlife, and install a version (distro, haha) of Lynx that Claude thinks is similar to Windows and very stable. Lynx is free, by the way.
Personally, I use NinjaTrader a lot and it requires Windows, so one of my PCs is stuck in the evil clutches of Windows. But my older one is going to jump the wall and run (faster, incidentally).
Hopefully Claude’s simple instructions will help you escape the Microsoft Matrix without migrating to Apple, assuming you don’t want to right now. Here’s Claude:
Switching From Windows 11 to Linux Mint
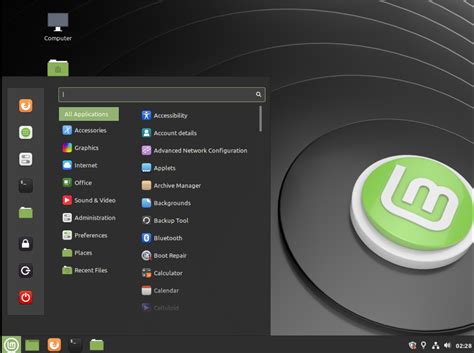
The version of Linux that looks and works most like Windows is Linux Mint, “Cinnamon Edition.” It has a start menu in the bottom-left corner, a taskbar along the bottom, and a clock in the bottom-right. It is known for being steady and dependable.
Read this first: three warnings
1. Your Windows programs cannot come with you. Programs made for Windows don’t run on Linux. You can save your files (letters, photos, spreadsheets), but not the programs. Linux has free replacements for most things. For example, LibreOffice comes built in and opens Word and Excel files.
2. NinjaTrader will not run on Linux. It only works on Windows. If you still trade with it, wiping Windows off this computer takes it away. Two safer choices:
- Do this on a different, spare computer.
- Buy a second internal storage drive (about $50) and have a computer shop swap it in, so the Windows drive is kept in a drawer.
3. Print this page or keep it on your phone. Your computer screen will be busy during the process.
What you need
- Memory stick #1, the “backup stick”: a large one, 128 gigabytes or bigger (labeled “128GB” on the stick or package). This holds your saved files.
- Memory stick #2, the “installer stick”: any stick of 8 gigabytes or more. Everything on it will be erased.
- The computer plugged into the wall and connected to the internet.
- About 3 hours.
Part 1: Make a list of your programs
- Click the Start button (the Windows symbol at the bottom of the screen).
- Click Settings (the gear picture), then Apps, then Installed apps.
- Take photos of this list with your phone. Scroll down until you’ve photographed all of it.
- Write down the passwords for your email, bank, and any website you use. You’ll need to sign in again later.
Part 2: Copy your personal files onto the backup stick
- Plug in memory stick #1.
- Open File Explorer, the yellow folder picture on the bar at the bottom of the screen.
- In the left column you’ll see Desktop, Documents, Downloads, Pictures, Music, Videos. For each one:
- Click it once to open it.
- Hold down the key marked Ctrl and tap A. Everything turns blue, which means it’s selected.
- Hold Ctrl and tap C. This copies it.
- In the left column, click your memory stick. It’s usually listed as “USB Drive” or by its brand name.
- Hold Ctrl and tap V. This pastes it onto the stick. Wait until the progress window closes.
- Small cloud pictures: If you see a little cloud next to your files, they live on the internet, not on the computer. Before copying, right-click that folder, choose “Always keep on this device,” and wait for it to finish.
- Check your work. Open the stick and double-click a few photos and letters to make sure they open.
- Unplug the backup stick and put it somewhere safe. Don’t use it again until Part 6.
Part 3: Make the installer stick
- Open your web browser and go to linuxmint.com.
- Click Download, then pick Cinnamon Edition. It’s a big file (about 3 gigabytes), so it may take a while.
- Go to etcher.balena.io and download the free program balenaEtcher. Install it like any other program.
- Make sure the backup stick is NOT plugged in. Now plug in memory stick #2.
- Open balenaEtcher. It has three big buttons, left to right:
- Flash from file: choose the Linux Mint file you downloaded (it’s in your Downloads folder).
- Select target: choose memory stick #2.
- Flash!: wait until it says it’s finished.
Part 4: Start the computer from the installer stick
Tapping keys while the computer starts often doesn’t work on Windows 11 computers. This method does.
- Leave memory stick #2 plugged in.
- Click Start → Settings → System → Recovery.
- Next to “Advanced startup,” click Restart now. Confirm if it asks.
- A blue screen appears. Click “Use a device.”
- Click your memory stick. It may be called “USB Drive,” “EFI USB Device,” or the stick’s brand name.
- A black screen with a short menu appears. Press Enter to choose “Start Linux Mint.”
- Wait a minute or two. Linux Mint appears on screen.
Nothing has been changed yet. You’re only trying it out. Click the network symbol at the bottom-right to connect to your Wi-Fi, and check that sound and screen work.
Part 5: Install Linux Mint (this erases Windows)
- Double-click the disc picture labeled “Install Linux Mint.”
- Choose English, then Continue. For keyboard, choose English (US), then Continue.
- When asked about “multimedia codecs,” check the box. This lets you play videos and music. Click Continue.
- For installation type, choose “Erase disk and install Linux Mint.”
- This permanently deletes Windows and everything on the computer. Only continue if you checked your backup stick in Part 2.
- Click Install Now, then Continue.
- Click on the map near Idaho to set your time zone. Click Continue.
- Type your name, a name for the computer, and a password. Write the password down on paper.
- Wait 10 to 30 minutes.
- When it says “Restart Now,” click it. When the screen tells you to, pull out the memory stick and press Enter.
Part 6: Getting settled
Keep your backup stick. Every month or so, copy your newest files onto it again.
Type your password to log in.
Install updates: In the bottom-right corner, click the small shield picture and choose Install Updates. Do this about once a week.
Bring your files back: Plug in the backup stick. Click the folder picture on the bottom bar. Drag your folders from the stick into the Home folder.
Get new programs: Click the menu button at the bottom-left and open Software Manager. It works like an app store, and everything in it is free. You already have:
Firefox for the internet
LibreOffice in place of Word and Excel
…
Hope someone finds this useful.
Nonlocal Love,
Morrill Talmage Moorehead, MD


